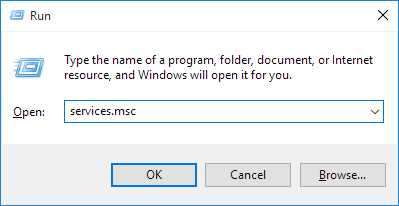
1. Press the Windows Key + R, and type services.msc into the Run dialog, and press Enter.
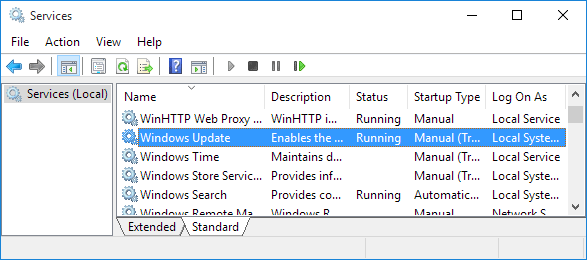
2. When the Services Manager opens, scroll down and search for the service "Windows Update" in the list.
3. Double-click on the Windows Update service and open its Properties window. Stop the service and choose Disabled from the Startup Type drop-down menu. This will disable Windows Update entirely.
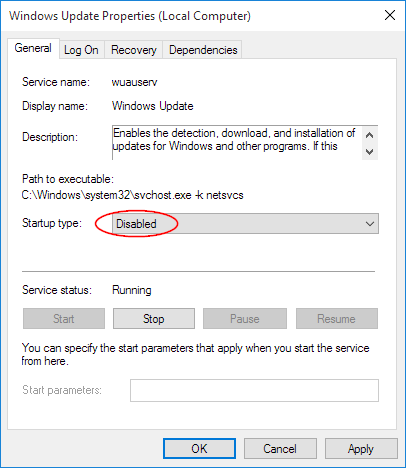
4. Go to Recovery. Set First Failure to No Action and click OK. The next time you start your computer, automatic updates will not be enabled.
Related Articles:
How to downgrade from Windows 11 to Windows 10?
How to update Windows 10 or Windows 11 of laptops?